Hi
My blog has now moved to another location. Come visit us in our new home! See you soon. Click here to visit...
Out.
Thursday, October 26, 2017
Monday, October 2, 2017
Shredded Brussels Sprouts Salad
So we had a lovely salad dinner at home, and we had to use some Brussels sprouts that someone had given us. I started with Saveur, my favorite recipe go-to site. Anyways I came across this recipe. It sounded easy and turned out to be delicious! Thanks again, Saveur.

Shredded Brussels Sprouts Salad with Walnuts
(Original recipe from Saveur)
3 cups Brussels Sprouts
2 tbsp whole grain mustard
4 tbsp lemon juice
1/2 cup extra virgin olive oil
1/2 cup shelled Walnuts, chopped
1/2 cup Parmesan, grated
Kosher salt and pepper, to taste
Shredded Brussels Sprouts Salad with Walnuts
(Original recipe from Saveur)
3 cups Brussels Sprouts
2 tbsp whole grain mustard
4 tbsp lemon juice
1/2 cup extra virgin olive oil
1/2 cup shelled Walnuts, chopped
1/2 cup Parmesan, grated
Kosher salt and pepper, to taste
- Trim the ends off the Brussels sprouts. Shred in a food processor or finely by hand.
- In a large bowl, whisk the mustard, lemon juice and olive oil. Add the Brussels sprouts and toss to coat. Season to taste with Parmesan, salt and pepper. Top with the walnuts.
Friday, September 25, 2015
Pan de Sal
I found this great recipe on Saveur and I'm a huge Saveur fan. Or at least I used to be. Now that the editor has changed, the recipes aren't so friendly anymore. And the foods are so America-centric now, when they used to be quite international.

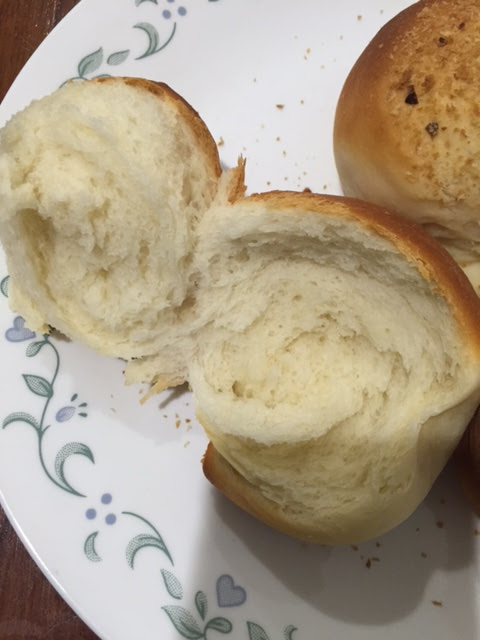
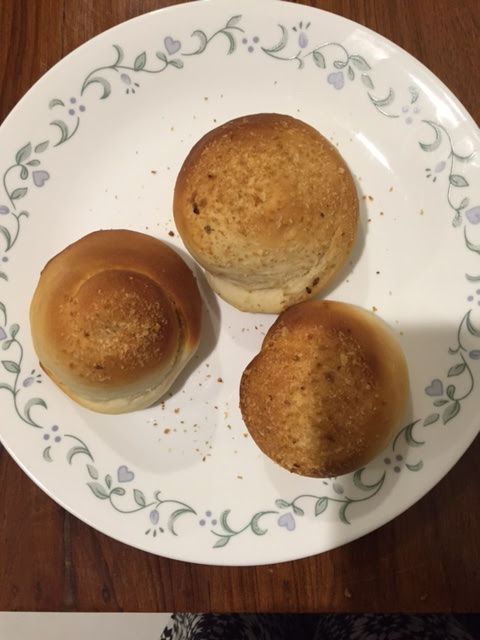
This Filipino Sweet bread, or Pan de Sal, is quite delicious and easy to make. They come out soft and delicious and quite pillowy. Do try it at home.
Pan de Sal (sweet Filipino bun)
(recipe from Saveur)
6 cups Flour (the recipe calls for bread flour, I used All-Purpose since we don't get bread flour here)
1 cup plus 1 tbsp Sugar
1.5 tsp Salt
2.5 cups Milk, warmed
1 tbsp Active Dry Yeast
4 tbsp, Butter, melted; plus more
1 Egg
1 cup Bread Crumbs
Combine the yeast, 1 tbsp sugar and 1 cup of the warmed milk in a bowl and set aside until frothy, about 5 minutes. Add the remaining milk, the melted butter and the egg.
In another bowl combine the dry ingredients: the flour, the 1 cup sugar and the salt.
Slowly add the dry ingredients to the yeast mixture until the dough begins to come together. Turn the dough out onto a lightly floured surface and knead for 2-3 minutes until smooth. Place the dough in a lightly greased bowl and cover loosely with muslin or plastic wrap until doubled in size, about 45 minutes, in a warm place.
Preheat oven to 180 deg. C
Place the bread crumbs on a plate.
Divide the dough into 4 equal pieces. Roll each piece out into a rectangle (approximately 4" by 9" and deep by 1/2"). Working from the long end, roll the rectangle into a tight cylinder. Cut the dough crosswise into five 1.5" rolls. Gently roll the cut sides in the bread crumbs. Place the rolls, bread crumbs up, onto a parchment paper-lined baking sheet. Repeat for remaining dough, placing them slightly apart. (Here's a video on how to shape the pan de sal. And here's a pictorial on how to shape it.)
Bake for 15-20 minutes or until golden brown.
Eat while warm.

This Filipino Sweet bread, or Pan de Sal, is quite delicious and easy to make. They come out soft and delicious and quite pillowy. Do try it at home.

Pan de Sal (sweet Filipino bun)
(recipe from Saveur)
6 cups Flour (the recipe calls for bread flour, I used All-Purpose since we don't get bread flour here)
1 cup plus 1 tbsp Sugar
1.5 tsp Salt
2.5 cups Milk, warmed
1 tbsp Active Dry Yeast
4 tbsp, Butter, melted; plus more
1 Egg
1 cup Bread Crumbs
Combine the yeast, 1 tbsp sugar and 1 cup of the warmed milk in a bowl and set aside until frothy, about 5 minutes. Add the remaining milk, the melted butter and the egg.
In another bowl combine the dry ingredients: the flour, the 1 cup sugar and the salt.
Slowly add the dry ingredients to the yeast mixture until the dough begins to come together. Turn the dough out onto a lightly floured surface and knead for 2-3 minutes until smooth. Place the dough in a lightly greased bowl and cover loosely with muslin or plastic wrap until doubled in size, about 45 minutes, in a warm place.
Preheat oven to 180 deg. C
Place the bread crumbs on a plate.
Divide the dough into 4 equal pieces. Roll each piece out into a rectangle (approximately 4" by 9" and deep by 1/2"). Working from the long end, roll the rectangle into a tight cylinder. Cut the dough crosswise into five 1.5" rolls. Gently roll the cut sides in the bread crumbs. Place the rolls, bread crumbs up, onto a parchment paper-lined baking sheet. Repeat for remaining dough, placing them slightly apart. (Here's a video on how to shape the pan de sal. And here's a pictorial on how to shape it.)
Bake for 15-20 minutes or until golden brown.
Eat while warm.

Saturday, September 19, 2015
Brown Butter Blondies
So brownies are ... nice. I actually prefer cookies. How about you? I'm not a huge brownie/ blondies fan. Blondies are just brownies with chocolate. I prefer blondies to brownies though. This was just delicious. I read this in a Bon Appetit magazine.This is now my effort to make all the recipes that I've bookmarked over the years. Please bear with me! :)
My kids made these. They are super easy to make.

Brown Butter Blondies
(recipe originally from Bon Appetit)
For the Brown Butter:
1/2 cup Butter
1 Egg
3/4 cup Brown Sugar
1 tsp Vanilla Extract
1/2 tsp Salt
1/3 cup All-Purpose Flour
For the Blondie:
1 cup Butter, softened
2 1/4 cups All-Purpose Flour
1 1/2 tsp Baking Powder
1 1/2 tsp Salt
1 3/4 cup Brown Sugar
2 Eggs
1 tsp Vanilla Extract
Make the Brown Butter Mixture:
Melt the butter in a saucepan, over medium heat, stir often until the butter foams and the butter browns, about 5-8 minutes. Let cool slightly.
Add the egg, vanilla, salt and brown sugar. Beat the mixture until smooth, about 3 minutes. Fold in the flour gently.
Make the Blondies:
Preheat the oven to 180 deg C.
Whisk together the dry ingredients: 2 1/4 cups flour, the salt and the baking powder. In a separate bowl, using an electric mixer, cream 1 cup butter and brown sugar until light and fluffy, about 5 minutes. Add eggs, one at a time, and beat until combined, and pale and fluffy. Mix in vanilla.
Mix in dry ingredients until completely combined.
Pour in half the blondie mixture into a buttered 13" by 9" baking dish. Smooth the top. Add the brown butter mixture as a layer on the top and smooth it out. Next add the remaining blondie mixture on top of the brown butter mixture.
Bake until golden brown, about 30-35 minutes. Allow to cool.

Thursday, September 17, 2015
Green Gram and Fenugreek Dosa
Dosas are a staple of south Indian cuisine. As much as paneer butter masala and chicken tikka are synonymous with Indian food for the western world, India has as many types of cuinines as we have states.
India is a sort of Europe, if you will. We are made of several states, each with their own cuisine, language, culture and clothing. Just like Europe is made of several countries, each with their own language, and culture. India is an amalgamation of all these states. Some cuisines and languages are just more well-known than others.
South India is made of four states and the one I live in is Tamil Nadu. The food here consists of fermented rice flours and mostly curries that have very mild spices. Of course even in Tamil Nadu, there are several kinds of food. We have many, almost a dozen sub-cultures, and they each have their own cuisines! Its quite wonderful, in a way. For example, food from different cities might be different, within the same state!
Dosas are pretty predominant across Tamil Nadu. Different people make it differently. There are so many many variations of this. I have made several variations myself in this blog. Well, you can imagine my delight when I came across this book: Dosai by Chandra Padmanabhan. She is one of my favorite south Indian cookbook authors. Every recipe of hers is a keeper! This book is so amazing. Here's a lovely recipe from the book.

Paithum Paruppu and Vendayam Dosai
(Green Gram and Fenugreek Dosa)
(recipe from Dosai by Chandra Padmanabhan)
Makes 10-12 dosais
1/4 cup husked green gram (mung dal)
2 tsp Fenugreek Seeds
1 cup Parboiled Rice
1 1/4 tsp Salt
1 tsp Cumin Seeds
3-4 Green Chillies, seeded and finely chopped
2 tbsp Coriander Leaves, finely chopped
1 Onion, finely chopped
5-6 Curry Leaves
Oil, as needed
Combine the dal and the fenugreek seeds. Wash well and soak in water for a couple of hours. Separately, wash the rice and soak for a couple of hours.
Drain and grind the dal, till light and fluffy, adding 1/2-3/4 cup water.
Drain the rice and grind to a smooth batter with 1-1 3/4 cups water.
Combine both the batters and add the salt and mix well. Set aside and allow to ferment for 4 hours.
When ready to make the dosas, add the cumin seeds, green chillies, coriander leaves, onion and curry leaves. Adjust the consistency by adding some water to make the batter of pouring consistency.
Prepare a tawa or flat top pan. To Prepare: Smear a thin layer of oil evenly on a tawa or griddle pan using a halved potato, or onion dipped in oil. Heat the tawa. When you sprinkle a few drops of water on it, it should sizzle.
With a clean wet cloth, wipe the tawa to remove excess oil. Lower heat and the tawa is now ready for cooking the dosai.
How to cook the dosai:
Pour a ladle of batter into the center of the tawa or griddle pan. Spread quickly using a circular motion with the back of the ladle to form a 6" round dosai.
Drizzle 1 tsp oil around the edges.
Raise heat and cook for 1-2 minutes, till the base is golden brown.
Turn over carefully and fry the other side, till crisp and golden. Remove from heat.
Wipe the tawa with a wet cloth after making each dosai so that it does not get over-heated.
Oil the tawa again if it becomes too dry.
Repeat for the remaining batter.
Serve hot with a chutney, podi and/or sambar.
Other dosais in this blog: Dosai, Peas Dosai, Neer Dosai, Tomato Dosai, Pesarat, Adai, Vegetable Adai, Akki Roti and Ilai Vadam.

Tuesday, September 15, 2015
The Miracle Mayo
I'm not really a fan of mayonnaise. In fact, I quite dislike it. But my kids love it. Seriously love it. I'm super picky that they don't eat a lot of mayo because I think it isn't healthy. I've also been on a major non-prepared foods phase, which has resulted in us making our own peanut butter, jam and mayo at home. We have also started making our own pasta and pesto. Soon we will be making our own bread. (I haven't quite perfected the perfect sandwich bread).
I've also started buying completely organic pasteurized milk, growing my own vegetables at home and buying any extra vegetables we need only from known farms that are local. I've also started composting our kitchen waste for our rooftop garden.
I came across this recipe in a Saveur magazine and decided I simply must try it since all our attempts at making mayo have utterly failed. Well, this one worked like a charm. Now I must say that it doesn't always work. I have no idea why, but sometimes when I follow the exact same steps, it just doesn't emulsify. But sometimes, it works like a dream.
Saveur's 20-second Mayonnaise
(recipe from Saveur)
1.5 tbsp White Wine Vinegar
1 tbsp Dijon Mustard (I don't always use Dijon)
1/2 tsp Salt
1 Egg
2 cups Canola Oil.
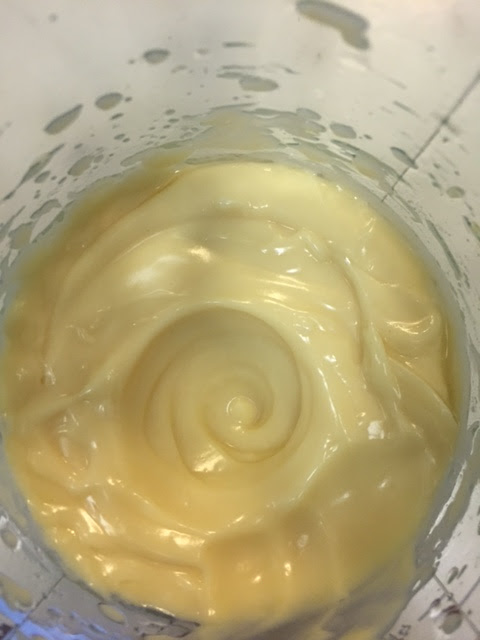
Put all the ingredients into a tall slender container. Lower an immersion blender into the container until its at the bottom. Turn it on and blend for 3-4 seconds and slowly bring it up, incorporating all the ingredients until it begins to emulsify and turn into mayo. The whole process takes about 20 seconds when its done right.
I have sometimes experimented by adding flavors to the mayo, like chilli powder or lemon rind, and it tastes great.
Enjoy.
I've also started buying completely organic pasteurized milk, growing my own vegetables at home and buying any extra vegetables we need only from known farms that are local. I've also started composting our kitchen waste for our rooftop garden.
I came across this recipe in a Saveur magazine and decided I simply must try it since all our attempts at making mayo have utterly failed. Well, this one worked like a charm. Now I must say that it doesn't always work. I have no idea why, but sometimes when I follow the exact same steps, it just doesn't emulsify. But sometimes, it works like a dream.

Saveur's 20-second Mayonnaise
(recipe from Saveur)
1.5 tbsp White Wine Vinegar
1 tbsp Dijon Mustard (I don't always use Dijon)
1/2 tsp Salt
1 Egg
2 cups Canola Oil.
Put all the ingredients into a tall slender container. Lower an immersion blender into the container until its at the bottom. Turn it on and blend for 3-4 seconds and slowly bring it up, incorporating all the ingredients until it begins to emulsify and turn into mayo. The whole process takes about 20 seconds when its done right.
I have sometimes experimented by adding flavors to the mayo, like chilli powder or lemon rind, and it tastes great.
Enjoy.
Sunday, September 13, 2015
Gozleme
Have you heard of these delicious Turkish Anatolian flat breads known as Gozleme?
They sounded familiar but I hadn't had one until this summer when we happened to be in gorgeous Sydney for the Vivid Sydney light festival. The festival sees the entire city light up every night in the most creative, gorgeous way and it is a sight to behold. While the festival is on the for the week, the streets are filled with lovely street stalls and one of them sold Gozleme. It seemed to be a hot favorite and so we stood in line for a good 20 minutes to get a hot, steaming Gozleme fresh off the pan.

It was delicious, crispy, flat bread stuffed with spinach and feta, full of flavor.
Back home in India, we wanted to have it one more time, and like most international foods, if you want to have something a little bit out of the ordinary, you have to make it yourself. Chennai is behind most cities in India in the diversity of its cuisine. It is getting more adventurous every year but still very far away from other cities in India.
Anyhow, I decided to make the gozleme. Having got the recipe off the web, here goes. (a small note here: I got the recipe from a website called Ozlem's Turkish Table. This website is quite a gem. She has step-by-step instructions for most recipes and every single item on there looks do-able and delicious! Do take a moment to go through her website. I've bookmarked half her savory pastries!!). It came out quite perfectly. Do give it a try. Its easy and even the kids love it.
Gozleme
(recipe from Ozlem's Turkish Table)
For the flat bread:
3 cups All-Purpose Flour, sifted
8 g Dry Instant Yeast
3 tbsp Olive Oil
2 tbsp Plain Yogurt
260 ml Warm Water
A pinch of salt
For the filling:
200 g Spinach Leaves, finely chopped
1 Onion, finely chopped
230 g Feta Cheese
1 tbsp Olive Oil
Crushed Red Pepper, or Chilli Flakes, or Red Pepper Paste, to taste (optional - you can make the filling as spicy as you'd like or omit it completely)
Divide the dough into 5 balls and keep aside, covered in a damp cloth, until doubled in size.
Meanwhile prepare the filling. Combine all the ingredients for the filling and knead well to release the flavors and make the onions softer. I ended up sauteeing the onions and blanching the spinach leaves.

Now roll out each ball into a thin, flat round. Fold the top and bottom edges of the round until they meet in the middle.

Spread the filling in the center and then fold the left and right sides until the filling is covered.

Press the edges together to seal.

Repeat for the remaining dough.
Heat a non-stick flat or griddle pan. Brush one side of the gozleme with olive oil and place, oil side down, on the pan and let cook for 5-6 minutes until browned. Brush the other side with olive oil and flip over and cook until both sides are brown.

Repeat for the remaining gozleme.
Serve either cut up into squares or rolled up. Attack! :)

They sounded familiar but I hadn't had one until this summer when we happened to be in gorgeous Sydney for the Vivid Sydney light festival. The festival sees the entire city light up every night in the most creative, gorgeous way and it is a sight to behold. While the festival is on the for the week, the streets are filled with lovely street stalls and one of them sold Gozleme. It seemed to be a hot favorite and so we stood in line for a good 20 minutes to get a hot, steaming Gozleme fresh off the pan.

It was delicious, crispy, flat bread stuffed with spinach and feta, full of flavor.
Back home in India, we wanted to have it one more time, and like most international foods, if you want to have something a little bit out of the ordinary, you have to make it yourself. Chennai is behind most cities in India in the diversity of its cuisine. It is getting more adventurous every year but still very far away from other cities in India.
Anyhow, I decided to make the gozleme. Having got the recipe off the web, here goes. (a small note here: I got the recipe from a website called Ozlem's Turkish Table. This website is quite a gem. She has step-by-step instructions for most recipes and every single item on there looks do-able and delicious! Do take a moment to go through her website. I've bookmarked half her savory pastries!!). It came out quite perfectly. Do give it a try. Its easy and even the kids love it.
Gozleme
(recipe from Ozlem's Turkish Table)
For the flat bread:
3 cups All-Purpose Flour, sifted
8 g Dry Instant Yeast
3 tbsp Olive Oil
2 tbsp Plain Yogurt
260 ml Warm Water
A pinch of salt
For the filling:
200 g Spinach Leaves, finely chopped
1 Onion, finely chopped
230 g Feta Cheese
1 tbsp Olive Oil
Crushed Red Pepper, or Chilli Flakes, or Red Pepper Paste, to taste (optional - you can make the filling as spicy as you'd like or omit it completely)
Combine about half the warm water, salt and yeast in a bowl and leave aside for 5 minutes until the mixture is frothy. Now combine the flour, yeast mixture, olive oil, yogurt, salt and the rest of the water. Combine all the ingredients and knead until a soft dough is formed.
Divide the dough into 5 balls and keep aside, covered in a damp cloth, until doubled in size.
Meanwhile prepare the filling. Combine all the ingredients for the filling and knead well to release the flavors and make the onions softer. I ended up sauteeing the onions and blanching the spinach leaves.

Now roll out each ball into a thin, flat round. Fold the top and bottom edges of the round until they meet in the middle.

Spread the filling in the center and then fold the left and right sides until the filling is covered.

Press the edges together to seal.

Repeat for the remaining dough.
Heat a non-stick flat or griddle pan. Brush one side of the gozleme with olive oil and place, oil side down, on the pan and let cook for 5-6 minutes until browned. Brush the other side with olive oil and flip over and cook until both sides are brown.

Repeat for the remaining gozleme.
Serve either cut up into squares or rolled up. Attack! :)

Subscribe to:
Posts (Atom)